Recently we posted an article with instructions on How to Connect the RICOH Ri 1000 to Ethernet. Shortly after posting, one of our followers Joel Lapinski commented that he was able to connect his Ri 1000 to his computer with WiFi. So we asked him to write up the detailed instructions so we could share with our readers. Thank you Joel for putting this together for the Ri 1000 community!
If you are just starting out with your printer we highly recommend starting out with a hard wired connection to your computer using the Ethernet connection instruction before jumping into this. Although the instructions are very detailed and tested by Joel to work, you may need some experience with setting up a wifi system or have someone that can help you. With that disclaimer out of the way, let’s jump into Joel’s instructions!
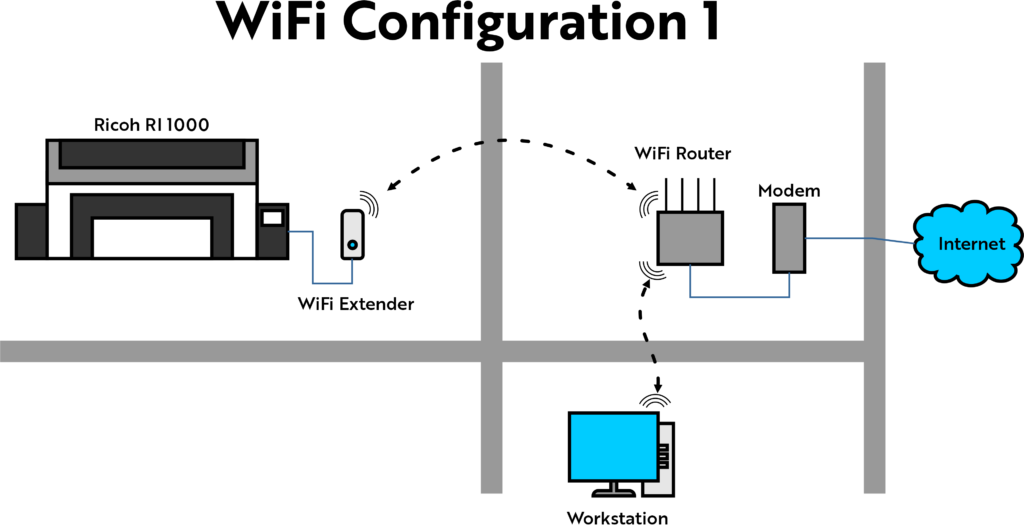
This will allow the RICOH Ri 1000 to be placed anywhere there are power outlets and eliminates running cable making it wifi capable. There are several ways this can be done and depends on the scale of your business or how many printers and cost. I went with the low-cost route since I am only connecting a single Ri 1000.
Have you tried SK Pretreat yet? See what others are saying!

Hardware Needed
There are many good brands of networking gear that you can choose from that do the same thing, but I went with TP-Link. I stayed with one brand because there are some features you get staying with one brand (for instance there is an app that can control both devices from my phone and setup is a little easier since the user interface is the same).
I am assuming that you have a separate modem or a combined WiFi router and modem already connected to the internet. NOTE: If you rent a WiFi router/modem from an Internet Service Provider (for example Spectrum and Brighthouse), many ISPs will lock their WiFi router/modems from accessing the network settings within the router. If this is the case, you will have to research what modem will be compatible with your ISP. You need to have access to the router’s network settings. I went with a separate modem and WiFi router for two reasons: 1. If either the router or the modem fails, one unit can be replaced without affecting the other; 2. If you change ISPs and your current modem is not compatible, you just change the modem only. I went with the Netgear CM600 that was compatible with my ISP.
Low Cost Option
- WiFi Router
Archer AX10 | AX1500 Wi-Fi 6 Router - WiFi Extender
TL-WA850RE | 300Mbps Universal Wi-Fi Range Extender - CAT5e or CAT6 Cables (if needed)
Setting Up Multiple Printers
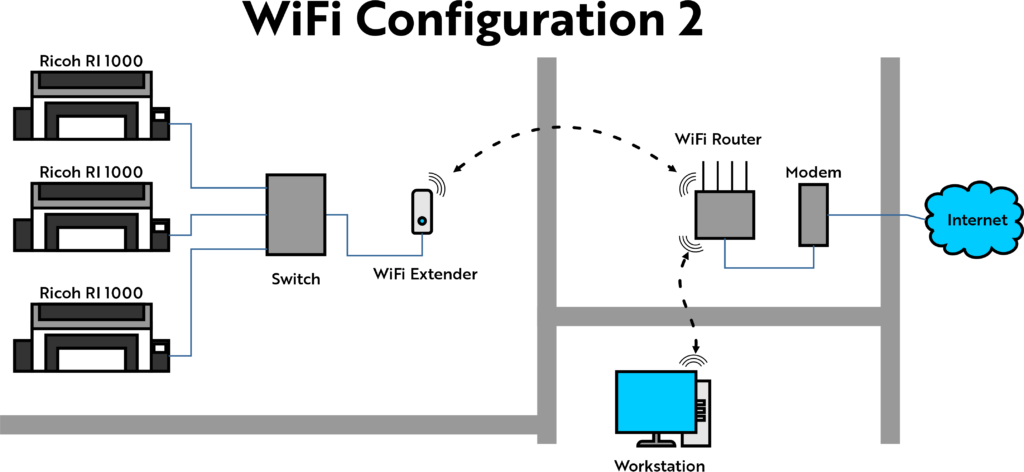
Option 1 –
- WiFi Router
Archer AX20 | AX1800 Dual-Band Wi-Fi 6 Router - WiFi Extender (higher bandwidth)
RE505X | AX1500 Wi-Fi 6 Range Extender - Switch (5, 8, 12 RJ45 ports)
TP Link – Switches - CAT5e or CAT6 Cables
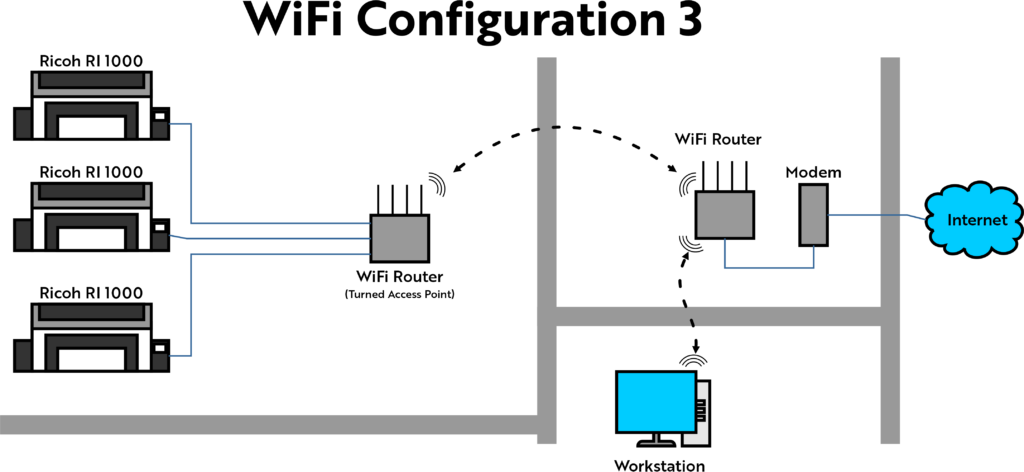
Option 2 –
- WiFi Router
Archer AX20 | AX1800 Dual-Band Wi-Fi 6 Router - 2nd WiFi Router (turned into access point)
Archer AX20 | AX1800 Dual-Band Wi-Fi 6 Router - CAT5e or CAT6 Cables
Setup and Connecting the Network
Setup the WiFi Extender
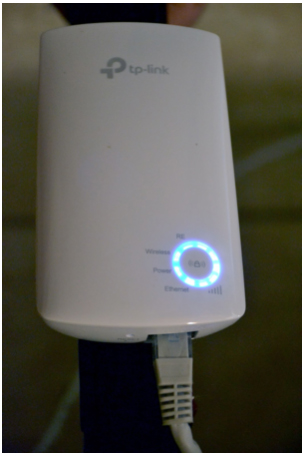
We will focus on this first WiFi configuration example on the right. You will want to put the WiFi Extender in a power outlet near your RICOH Ri 1000. Go through the WiFi extender setup to connect to your network and plug the CAT5e or CAT6 cable (you might need to plug in a computer for setup before you plug in the printer) and then plug into your Ri 1000.
RICOH Ri 1000 IP Address Configuration
Once you connected the Ri 1000 to the WiFi Extender, a static IP address will have to be chosen.
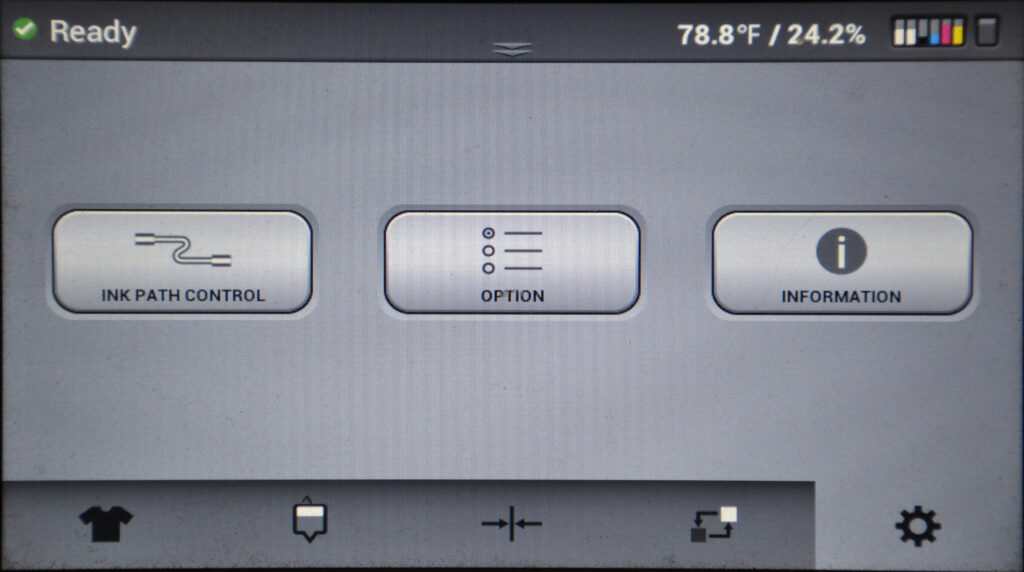
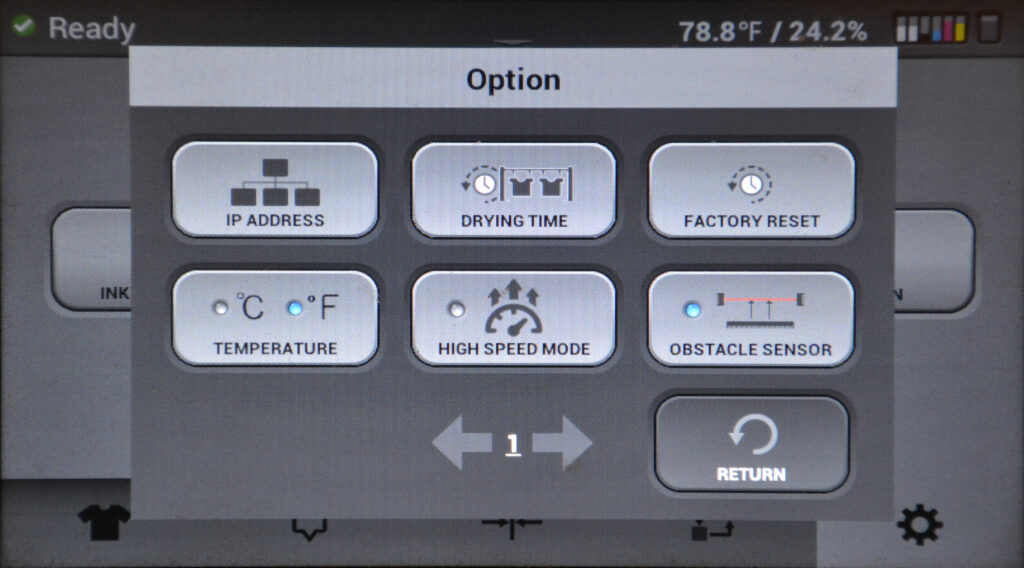
First, select the settings tab and then press the IP Address button.
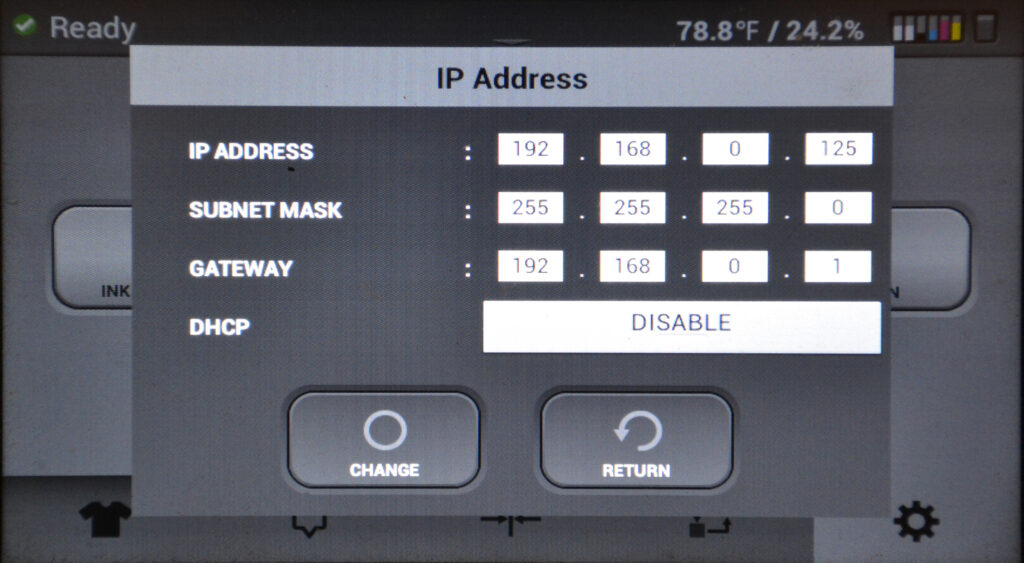
You will have to enter in an IP address that you will later set in the router as a static IP address for this printer.
I would suggest something like this:
IP ADDRESS: 192.168.0.125
SUBNET MASK: 255.255.255.0
GATEWAY: 192.168.0.1
DHCP: DISABLE
Make sure you disable the DHCP. This will keep your IP address from being dynamic and the same all the time….in other words static. Hit the change button to set it.
WiFi Router Setup for RICOH Ri 1000
Login to your router admin by a web browser. It is usually by default 192.168.0.1 or 192.168.1.1 typed in your browser search bar and the login page will open. You have to be connected to the same network that your router is on. NOTE: Every router will have a default password or the ISP will place it on the bottom of the router if you are renting, I would highly suggest updating the password.
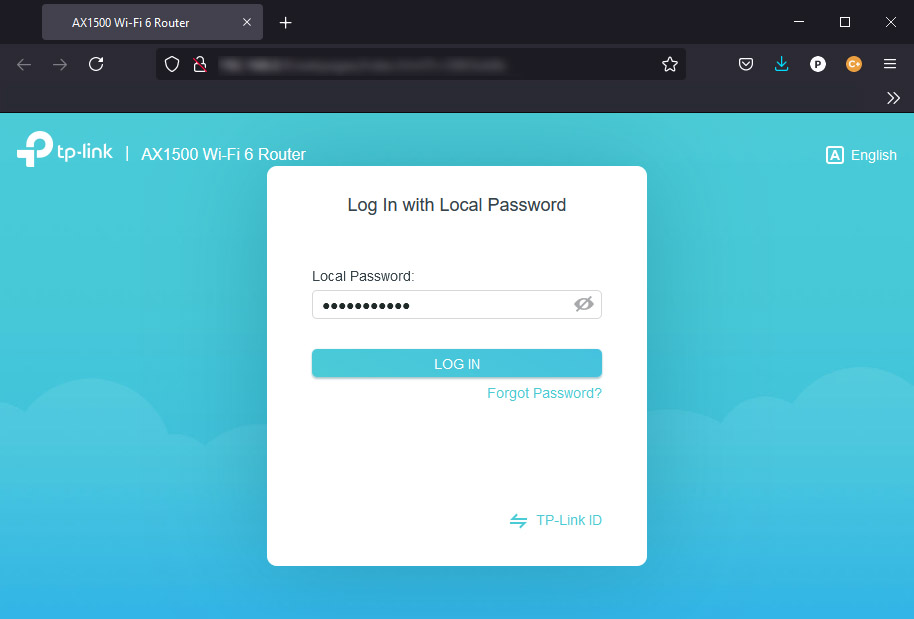
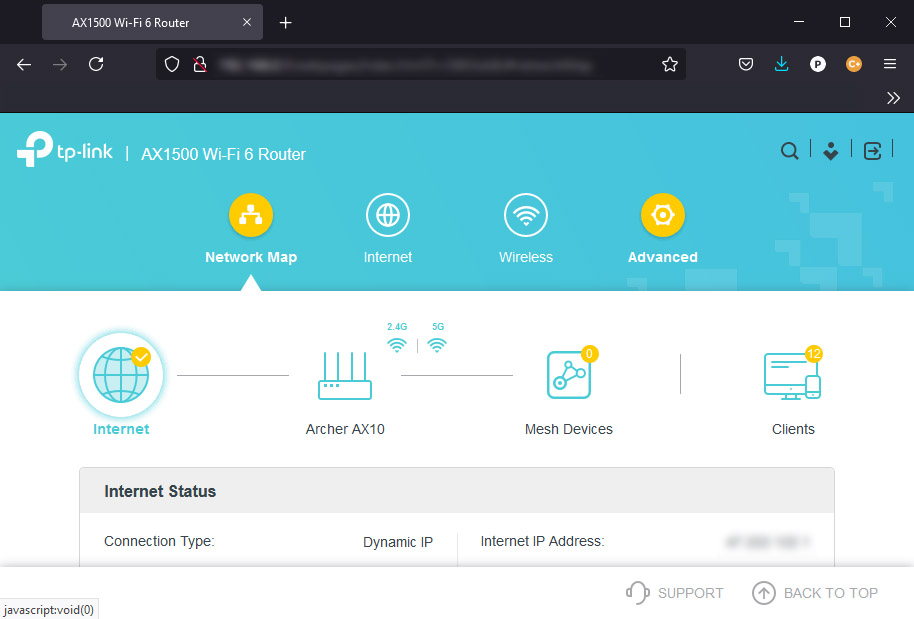
Once logged in you will need to establish a Static IP address for the RI1000 and WiFi Extender. Go into the advanced settings to the DHCP Server.
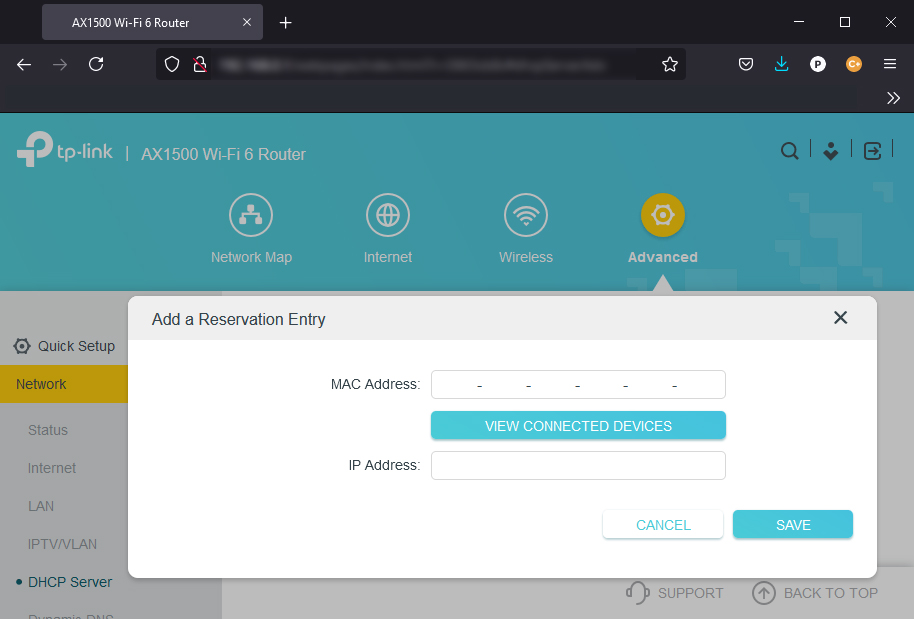
Once you are in the DHCP Server settings, find the Address Reservation area and click ADD. Click the VIEW CONNECTED DEVICES and see if the IP address 192.168.0.125 shows up. If it does select it–if not go back and manually type in the address and save. Do this also for the WiFi Extender. NOTE: I had to reboot the printer and the WiFi Extender for it to show up in the search.
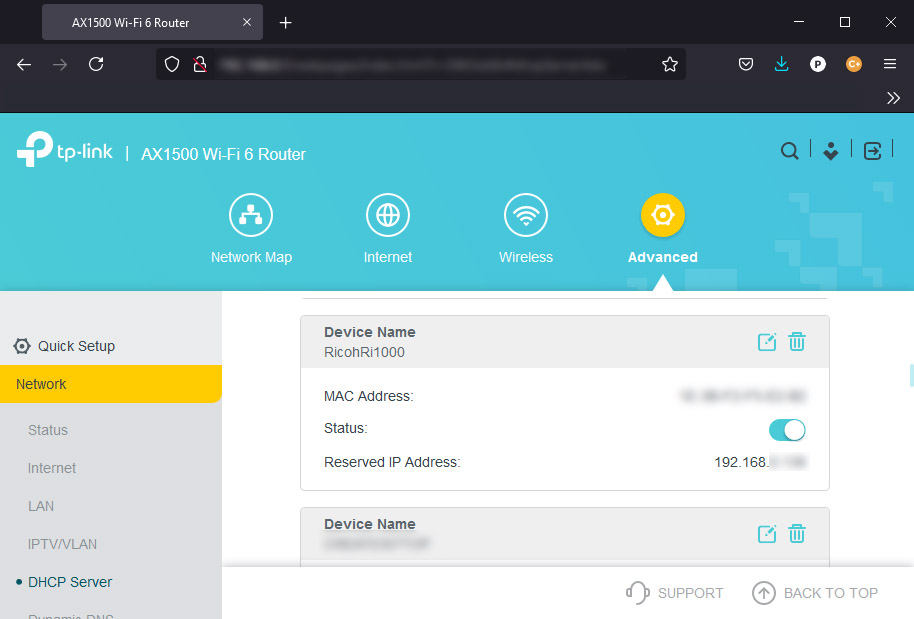
The RI1000 should show up in the list of the reserved IP addresses and the same with the WiFi Extender.
How to Set-Up AnaRIP For WiFi
Now we have to see if AnaRip will see it. Open AnaRip and go to the View menu and select Manage Printers.

Select the Add printer by address button and add the address 192.168.0.125.
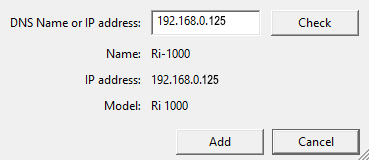
Then click Check and it should find it. Once it does, click Add and it should show up in your list.
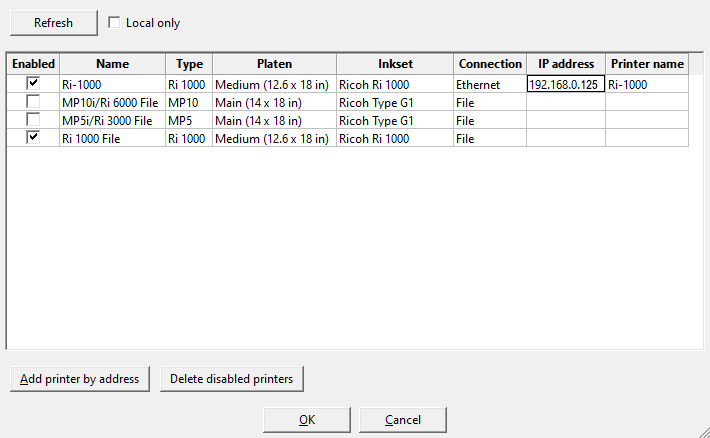
Hit OK and you are ready to print.

About the Author
Joel Lapinski is the founder of Create-this LLC. which provides custom creative designs for EVERY occasion.
Create-this is a “Direct to Garment” printing company located in Forney, Texas.
They offer both Branding and Creative Custom Graphic Design Services.
Check out their work and follow Create-this on Facebook.


